How to Dry Pumpkin Seeds: The Simple Guide to Perfect Snacks
Published: 11 May 2025
Hi superfood lovers!
Have you ever wondered what to do with all the pumpkin seeds after carving a pumpkin? I used to wonder the same thing! Then I learned how to dry pumpkin seeds; now, it’s one of my favourite things. It’s super easy, and once they’re dried, you can save them for a long time and enjoy them as a yummy snack.
Hi, I’m Sheila, and I’ve been studying plants for over seven years. In this article, I’ll show you a few simple ways to dry pumpkin seeds, like air drying, drying them in the oven, and even drying them overnight. I’ll also share how to store them and make them taste extra yummy.

By the end of this article, you’ll know exactly how to dry pumpkin seeds and turn them into a healthy snack. Let’s get started!
How to Dry Pumpkin Seeds: Essential Methods
Drying pumpkin seeds is straightforward, but there are several methods you can use, depending on your time and preferred results. Whether you aim for a snack to enjoy immediately or store them for later use, each method ensures your seeds stay fresh and nutritious.
Below, we explore the most popular ways to dry pumpkin seeds, each with unique benefits.
How to Dry Pumpkin Seeds for Roasting
Drying pumpkin seeds before roasting is essential for getting that crispy texture. You wouldn’t want to roast too moist seeds; they’ll turn watery instead of crunchy, just like when you bake a soggy potato instead of a crispy one.
- Preparation: First, Take the pumpkin seeds out and wash them well to get rid of any pulp. Then, pat them dry with a towel to absorb excess moisture.
- Drying: Lay the seeds on a single layer of a baking sheet. For the best results, preheat your oven to 200°F (about 93°C) and dry the seeds for 20-30 minutes, stirring them halfway through. Keep an eye on them, this process should dry, not roast, the seeds. The goal is to dry them thoroughly before roasting.
- Personal Tip: I’ve found that drying the seeds in batches, especially when the pumpkin yield is significant, works wonders. If you don’t want to take the oven space, use a dehydrator for more consistent results.
How to Dry Out Pumpkin Seeds (Air Drying)
Air drying is an excellent option if you’re in no rush and prefer a natural method. It’s simple, eco-friendly, and doesn’t require electricity. Just think of it as drying clothes on a clothesline—if you have the patience, this method works wonders!

- Preparation: Clean your seeds and spread them thinly on a dry towel or net drying rack.
- Drying: Find a warm, dry area with good airflow to place the seeds. Ideally, you want them to dry for 1-2 days. Ensure they’re not exposed to direct sunlight, which can degrade their nutritional quality.
- Personal Tip: I’ve air-dried my pumpkin seeds outdoors when the weather’s nice, but I bring them in if there’s any humidity—moisture is the enemy of good drying.
How to Dry Pumpkin Seeds Overnight
Sometimes, life gets busy, and you need a drying solution that fits your routine. Drying pumpkin seeds overnight is a fantastic solution—low effort, and they’re ready for roasting in the morning. It’s like setting a slow cooker; you get the results with little effort while you sleep!

- Preparation: Spread your cleaned pumpkin seeds on a baking sheet, ensuring they’re in an even layer.
- Drying: Place the baking sheet in the oven with the slightly open door. Turn the oven light on, providing enough heat to dry the seeds gently. Leave them overnight, and they’ll be ready for roasting or eating in the morning.
- Personal Tip: I often use this method during the fall months when I’m processing a lot of pumpkins at once. The oven light is a perfect low-heat option, especially when you don’t want to keep your oven running all day.
How to Dry Pumpkin Seeds in Oven
For a quicker option, using your oven is one of the most efficient ways to dry pumpkin seeds. Think of it as using the oven as a mini dehydrator—fast, consistent, and effective.

- Preparation: Preheat your oven to 170°F (about 77°C). Place the washed and rinsed seeds in a single layer on a baking sheet with enough space for airflow.
- Drying: Place the sheet in the oven for 20-30 minutes, stirring halfway through. Keep an eye on the seeds to avoid over-drying; they should remain crisp but not burnt.
- Personal Tip: I like to check on my seeds every 10 minutes. It’s small, ensuring I’m not drying them too fast or unevenly.
How to Dry Pumpkin Seeds for Eating
The drying process is still key if you prefer to consume your pumpkin seeds raw or lightly roasted. By drying the seeds first, you lock in the nutrients while preserving the natural flavour, just like drying herbs before using them in a dish.
- Preparation: Clean the seeds thoroughly and place them in a single layer on a baking sheet or drying rack.
- Drying: Follow any of the above-mentioned methods, whether air drying or oven drying, until the seeds are thoroughly dried but not roasted.
- Personal Tip: As a botanist, I often recommend this method for people looking to add pumpkin seeds to their diet without the added oil or spices. Drying them naturally keeps all the vitamins intact, especially if you use them for smoothies, granola, or salads.
Storing Dried Pumpkin Seeds for Long-Term Use
Once your pumpkin seeds are perfectly dried, storing them correctly is just as crucial as the drying process itself. Think of it like preserving homemade jam—if you don’t seal it properly, all that hard work can go to waste. The same goes for your dried seeds: store them right, and they’ll stay fresh and crunchy for months.
Use Airtight Containers
- Always store your dried pumpkin seeds in a clean, airtight container: glass jars, mason jars, or BPA-free plastic containers work great.
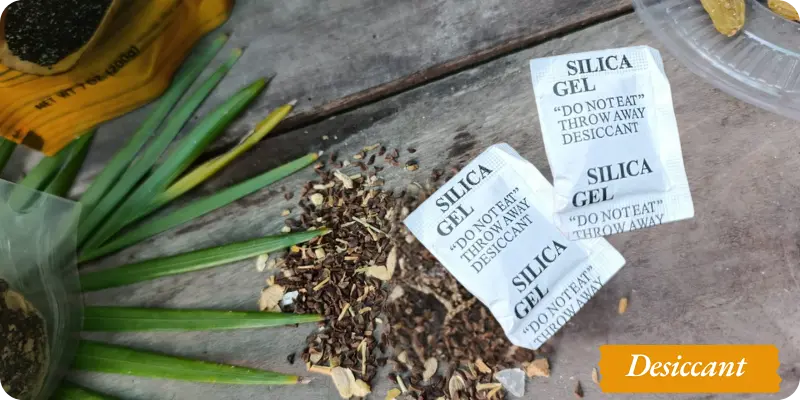
- Avoid using bags that trap moisture, like zip-locks, unless you add a food-safe desiccant pack.
Choose a Cool, Dark Spot
- Place your containers in a cool, dark pantry or kitchen cupboard away from direct sunshine and heat.
- Light and heat can make the oils in pumpkin seeds go rancid over time.
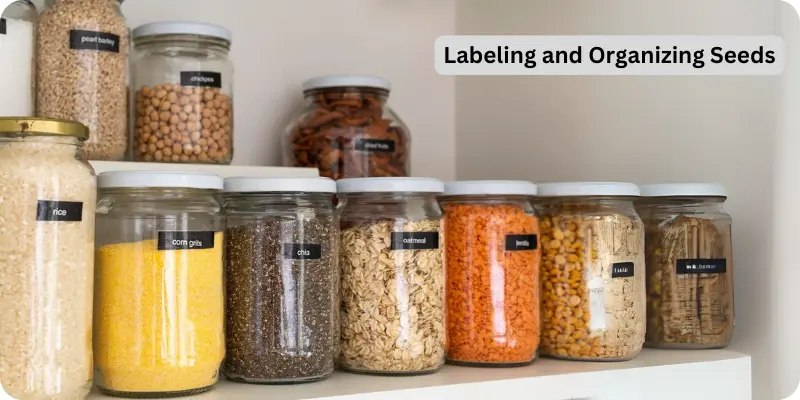
Label and Date
- If you’re drying and storing seeds often (like I do in the fall!), label your jars with the date.
- It’s a small step, but it helps you use the oldest batch first and keep things organized.
Check Occasionally
- Give the jar a gentle shake every few weeks and check for any signs of moisture or mold.
- If the seeds smell misty or feel soft, they may have absorbed moisture and should be used quickly or discarded.
Freezer Option for Extra Shelf Life
- You can freeze your dried pumpkin seeds for even longer storage up to a year. Just make sure they’re in an airtight freezer-safe container to avoid freezer burn.
- It’s like giving your seeds a nap until you’re ready to snack!
Personal Tip: I love prepping a big batch of dried pumpkin seeds after Halloween. I keep half in the pantry for quick roasting and toss the other half in the freezer to use in winter trail mixes. My little seasonal tradition helps reduce waste and adds a homemade touch to healthy snacks year-round.
| ⚠️ Three Precautionary Measures |
|---|
Avoid drying seeds in a humid environment: Air moisture affects drying and increases fungal danger. Always choose a well-ventilated, dry space. Never store seeds before they are dehydrated: Even a small amount of moisture can lead to spoilage or a musty smell. Check for a crisp, dry texture before sealing them up. Don’t use high oven heat for drying: High temperatures can roast the seeds instead of drying them, which alters their nutritional content. Keep it low and slow (around 300°F / 150°C). |
Flavouring and Roasting Dried Pumpkin Seeds
Once your pumpkin seeds are thoroughly dried, it’s time for the fun part: flavouring and roasting! Think of it like dressing up plain popcorn. With the right spices and oven magic, you can turn your dried seeds into a crave-worthy, crunchy snack that rivals anything store-bought.

Preheat the Oven
- Preheat your oven to 300°F (150°C).
- The moderate temperature allows the seeds to roast evenly without burning the seasonings.
Choose Your Seasoning
Here’s where your creativity can shine. Some classic combos include:
- Savory: Olive oil, sea salt, garlic powder, and paprika.
- Spicy: Chili powder, cayenne, and lime zest.
- Sweet: Cinnamon, coconut sugar, and a drizzle of maple syrup.
Personal Tip: I often make a small batch of each flavour for variety. My go-to? Olive oil with smoked paprika and a pinch of cumin: simple but packed with warmth.
Coat Evenly
- Toss your dried seeds with oil and your chosen spices in a bowl.
- Make sure each seed is evenly coated so every bite delivers flavour.
Spread and Roast
- Spread the seasoned seeds in a single layer on a baking sheet.
- Roast for 20–25 minutes, stirring halfway through for even crisping. They’re done when golden brown and aromatic.
Cool and Store
- Let the seeds cool completely before storing them. This step helps maintain that perfect crunch.
- Store them in an airtight jar for up to a week (though they rarely last that long in my house!).

Roasting seeds is like fine-tuning a good song; you start with a solid base and layer in flavours until it sings.
Personal Insight: I often involve my kids in this step: letting them mix their seasoning blends makes them more excited to snack on something healthy. Plus, it turns a simple recipe into a family memory.
| 🎃 Fun & Fascinating Facts |
|---|
Pumpkin seeds were once pocket snacks for pioneers! Before trail mix existed, early American settlers dried pumpkin seeds for long journeys. They were lightweight, nutritious, and didn’t spoil quickly—kind of like nature’s original protein bar. One pumpkin can yield over 500 seeds! That’s enough to fill a jar of crunchy snacks or grow your backyard pumpkin patch. It’s like getting a harvest bonus with every pumpkin you open! Drying seeds is like giving them a long nap before a new life or a crunchy snack! Whether roasting them for flavour or saving them for planting, drying puts seeds in “pause mode”—a clever trick nature built right in. |
Final Verdict
Mastering how to dry pumpkin seeds isn’t just about better taste—it’s about preserving nutrients, ensuring safe storage, and unlocking the full potential of this healthy snack. By understanding the moisture removal process and ideal storage conditions, you’re setting yourself up for long-term success, whether you’re snacking, planting, or cooking.
If you’re new, start with the air-drying method; it’s mess-free, straightforward, and lets you experience the process naturally.
So, don’t toss those seeds the next time you carve a pumpkin! Try drying them and transforming scraps into super snacks.
👉 Try it today and share your results—I’d love to hear your favourite flavours or drying tricks!
Frequently Asked Questions
If you’re starting with drying pumpkin seeds, you’re probably wondering about the little details—like how long to dry them, how to store them, or whether you can eat them raw. Here are answers to the most common beginner questions to help you confidently move forward.
Yes, it’s best to rinse the seeds in a colander under cold water to remove any leftover pumpkin flesh. Clean seeds dry faster and more evenly. Gently press them to dry with a towel before starting the drying process.
Absolutely! Oven drying is quicker—typically takes 20 to 30 minutes at 300°F (150°C). Just stir them halfway through so they dry evenly without roasting.
Air-drying pumpkin seeds usually takes 1 to 2 days, depending on the humidity and airflow in your space. Spread them out in a single layer and stir occasionally. Make sure they feel dry and slightly brittle before storing or roasting.
You can eat them raw after drying as long as they’ve been cleaned and thoroughly dried. They have a mild, nutty flavour and are rich in nutrients. For extra flavour, many people prefer roasting.
Drying the seeds first helps them roast more evenly and get that perfect crunch. Moist seeds tend to steam instead of roast, affecting the texture. It’s a small step with significant results.
Dried seeds feel firm and burst easily when bent. They shouldn’t feel soft or sticky. They’re ready if you hear a light “crack” when you bite into one!
It’s best to dry the seeds first, then season before roasting. Seasonings won’t stick well to wet seeds and may burn in the oven. Drying first gives better flavour and texture.
Yes! Pumpkins are rich in fiber, protein, healthy fats, and minerals like magnesium and zinc. Homemade seeds are also free from additives and preservatives—perfect for guilt-free snacking.
If you plan to plant them, use seeds from an heirloom or non-hybrid pumpkin variety. Make sure they’re completely dry, and save them in a paper envelope in a cool, dry place. Don’t roast them if you plan to grow them.


- Be Respectful
- Stay Relevant
- Stay Positive
- True Feedback
- Encourage Discussion
- Avoid Spamming
- No Fake News
- Don't Copy-Paste
- No Personal Attacks
- Be Respectful
- Stay Relevant
- Stay Positive
- True Feedback
- Encourage Discussion
- Avoid Spamming
- No Fake News
- Don't Copy-Paste
- No Personal Attacks
