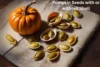
How to Grow Pumpkin Seeds: A Beginner’s Friendly Guide
Published: 30 Jan 2026
Hello, young growers!
Do you dream of turning tiny seeds into big, glowing pumpkins? When I planted a few pumpkin seeds in my backyard, I never thought they would grow into long vines and bright orange pumpkins. Growing pumpkins from seeds is easy, fun, and exciting, even if you’re starting. Whether you have a big yard or just a small space, learning how to grow pumpkin seeds will make you love gardening even more.
I’m Sheila, and I’ve spent seven years helping gardens grow strong and healthy. In this guide, I’ll show you every simple step, from picking the best seeds to planting, caring for them, fixing problems, and finally, picking your pumpkins. I’ll explain everything in a way that’s easy to follow and fun.
When you finish reading, you’ll know how to grow your pumpkin seeds. Let’s start planting together because growing pumpkins is like growing dreams: it all begins with one small seed of hope!
How to Grow Pumpkin Seeds: Step-by-Step Process
Growing pumpkins from seeds is an exciting journey that allows you to connect with nature and enjoy the fruits of your labour. Whether gardening in a big backyard or working with limited space, following the proper steps can lead to a successful pumpkin harvest.
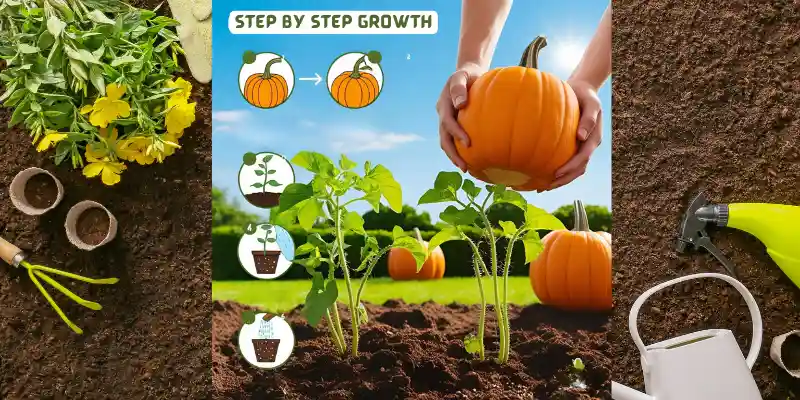
Let’s dive into the process of growing these versatile and rewarding plants!
Step 1- Choosing the Right Pumpkin Variety for Your Garden
When selecting pumpkin seeds, choosing the right variety for your garden space and growing conditions is essential. Think of it like choosing the perfect shoe; each pumpkin variety fits a different need, depending on the space, climate, and your intended purpose.
- Large Pumpkins: Great for those with a lot of space who want pumpkins for carving or baking. These pumpkins need full sun, rich soil, and spreading room.
- Small Pumpkins: Perfect for limited space or growing in containers. Varieties like ‘Sugar Pie’ and ‘Baby Boo’ grow compact and still produce beautiful pumpkins, ideal for decoration or making pumpkin pies.
- Ornamental Pumpkins: These tiny, colourful pumpkins charm any garden or porch. They’re not suitable for cooking, but their unique shapes and colours make them perfect for fall decor.
Climate Considerations
Choosing the right variety also depends on your climate. Some pumpkins thrive in warm, sunny climates, while others tolerate cooler temperatures.
- If you’re in a warmer zone, consider heat-tolerant varieties, like ‘Autumn Gold.’
- For cooler climates, pumpkins such as ‘Jarrahdale’ are more likely to thrive.
Personal Insight: I chose the ‘Cinderella’ pumpkin (a beautiful, flattened pumpkin) without considering the hot climate I lived in. It struggled to grow, and I learned the hard way that understanding the ideal growing conditions is crucial!
Tips for Choosing the Right Variety:
- Consider how much space you have. Larger pumpkins need more room to sprawl, while smaller ones work well in containers or small plots.
- Think about what you plan to do with the pumpkins. For carving, a large varieties work best. For cooking, you might want sweeter varieties like ‘Sugar Pie’.
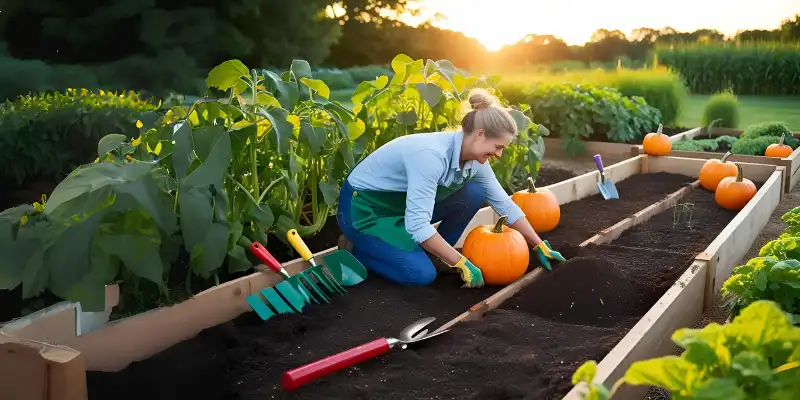
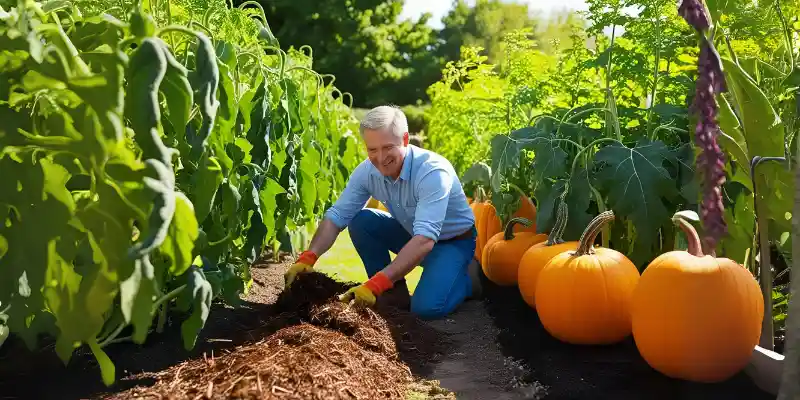
Step 2- Preparing Your Garden Bed or Container
- Before you plant your pumpkin seeds, giving them the best possible start is essential, much like laying a cozy, rich foundation for a new home. Pumpkins are heavy feeders, which means they love soil that’s well-drained, loose, and packed with organic matter. If the soil feels sticky or clumpy when wet, it’s time to amend it for better drainage and nutrition.
- Adding compost or a good-quality organic fertiliser works wonders. Think of compost as a gourmet meal for your pumpkin plants; it’s full of nutrients that fuel strong root development and vigorous vines. I remember the first time I skipped enriching my soil, thinking it wouldn’t matter much; I ended up with weak plants and tiny pumpkins. Ever since, adding a generous layer of compost before planting has been my secret to healthy, thriving pumpkin vines.
Soil Tips
- Seeking soil with a pH between 6.0 and 6.8, slightly acidic to neutral, is ideal.
- Mix 2–4 inches of well-rotted compost or aged fertilizer into the top 8–10 inches of soil.
- If you’re working with poor soil, consider raised beds or large containers to control the quality better.
Spacing Requirements
Pumpkin vines need room to roam. Imagine trying to spread out on a tiny sofa: uncomfortable, right? That’s how a pumpkin feels in a cramped space.
- Traditional garden beds: Space mounds about 4 to 6 feet apart, with seeds planted 2 to 3 feet apart within rows.
- Containers: Choose a large container (at least 20–25 gallons) and plant one seed per pot. If space is tight, opt for bush or mini varieties.
If you’re into pumpkin container gardening, look for compact types like Jack Be Little or Baby Pam; these thrive even with limited room.
Step 3- Planting Pumpkin Seeds
- Timing is everything when it comes to planting pumpkin seeds. Like setting out on a road trip, you want to start at just the right moment to avoid unexpected bumps. For most climates, spring is the best time to plant pumpkin seeds, a week or two after the last frost date. Pumpkins are warm-season crops; cold soil can easily stunt their growth or kill young seedlings.
- Personal Experience: When the soil temperature consistently stays above 70°F (21°C), it’s time to sow your seeds. In my early gardening days, I made the mistake of planting too soon, excited to start. Unfortunately, a late frost wiped out my first batch. Since then, I have always checked the soil temperature with a simple garden thermometer; a small step makes a big difference.
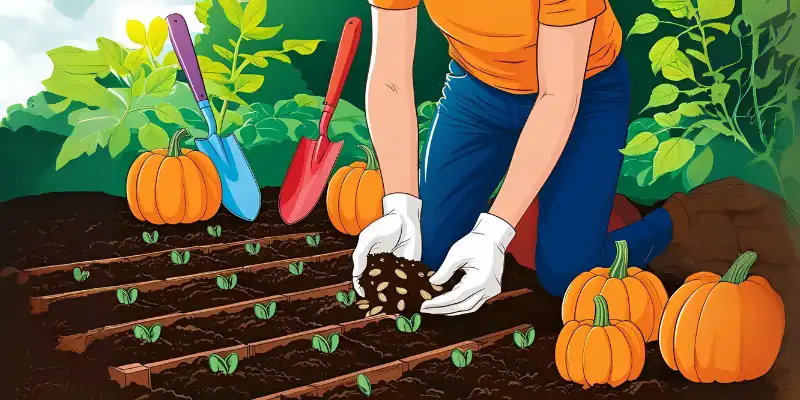
Step-by-Step Directions for Planting Pumpkin Seeds:
- Prepare the soil by loosening it at least 12 inches deep and mixing in rich compost or organic fertiliser.
- Plant pumpkin seeds 1 inch deep into the soil. Gently cover them with loose soil, not packed too tightly.
- Space seeds 2 to 3 feet apart if you’re planting in rows. If you’re short on space, plant two or three seeds in small mounds (or hills) about 4 to 6 feet apart. Once the seedlings sprout, thin them to the most vigorous plant.
- Water gently after planting, ensuring the soil is moist but not soggy.
Rows vs. Mounds: Which is Better?
- Rows work well if you have a large garden bed and want to keep your vines organised. Think of it like setting up lanes on a track field; everything runs smoothly and in a line.
- Mounds (Hills) are great for encouraging better drainage and warmer soil, which pumpkins love. Picture little islands in your garden; these raised spots give your plants a head start by warming up faster in spring.
If you live in an area with heavy spring rains, planting on mounds is especially helpful to prevent seed rot. Plus, it makes harvesting easier as the pumpkins grow above ground.
Step 4: Watering and Caring for Your Pumpkin Plants
Once your pumpkin seeds sprout and vines spread, caring for your plants becomes as important as planting them. Think of pumpkins like thirsty travellers crossing a desert; without consistent water, they can’t thrive.
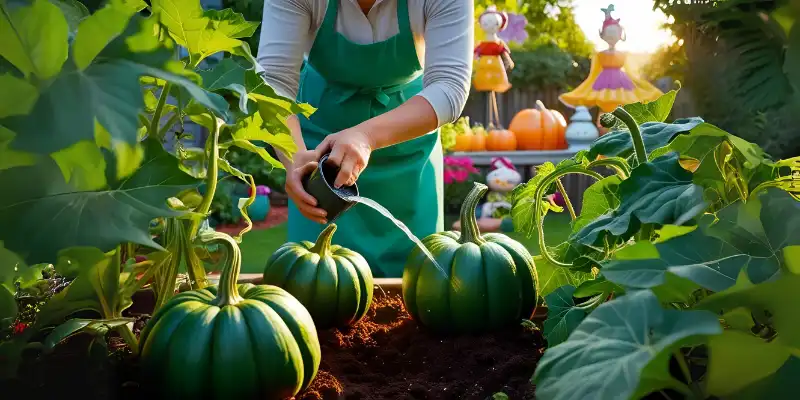
Watering Needs: How Much and How Often?
- Pumpkins love water, especially when they’re flowering and setting fruit. A general rule is to give your pumpkin plants 1–2 inches of water per week, but they might need even more during hot, dry spells. I learned early on that skipping even a few days in midsummer could cause wilting vines and more miniature pumpkins. Staying consistent truly makes all the difference!
- Focus on deep watering rather than frequent, light watering. Deep watering helps the roots grow strong and deep, enabling the plant to withstand heat and dry spells. It’s like training a tree’s roots to seek hidden treasure underground rather than relying on surface puddles.
Best watering techniques
- Water at the base: Always water directly at the soil level, aiming for the roots. Be careful getting the leaves wet to prevent fungal diseases like powdery mildew.
- Morning watering: Water early in the day so that any moisture on the plant can dry before nightfall.
- Use irrigation hoses or drip irrigation: These methods deliver water right where needed and conserve water by minimising evaporation.
Weed Control and Mulching for Healthy Plants
Weeds are like uninvited guests at a party; they take up space, consume resources, and make life harder for your pumpkins. Regularly removing weeds ensures your pumpkins get all the necessary nutrients and water.
The addition of a thick layer of organic mulch (like straw, dried grass clippings, or shredded leaves) around the base of your plants does wonders.
Advantages of Mulching
- It helps retain soil moisture, allowing you to water less frequently.
- Suppresses weeds naturally.
- It keeps the soil temperature stable, which pumpkins love.
From my experience, the year I mulched heavily around my pumpkin patch, I noticed healthier vines, fewer weeds, and many plumper pumpkins. A little mulch goes a long way!
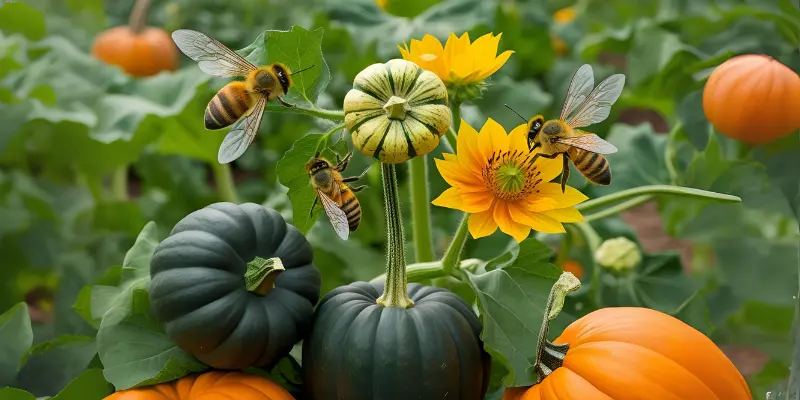
Step 5-Pollination: Helping Your Pumpkins Grow
Pollination is like the secret handshake between flowers and fruit; without it, your pumpkin vines will blossom beautifully but never bear fruit. In the world of pumpkins, bees are the true heroes, moving pollen from male to female flowers and kickstarting the magic of pumpkin growth.
How are pumpkin flowers pollinated?
Pumpkin plants produce two types of flowers: male and female.
- Male flowers usually appear first, waving bright yellow petals to attract bees.
- Female flowers (you can spot them easily, they have a tiny baby pumpkin beneath the bloom) appear shortly after.
Bees naturally transfer pollen from male to female flowers during their morning foraging. Those beautiful flowers will wither away without forming pumpkins without this vital step.
I remember feeling excited when I saw dozens of flowers in my early gardening days, only to realize no pumpkins were forming! It turned out I had very few pollinators visiting. Lesson learned: a thriving garden is a pollinator-friendly garden.
Tips for Attracting Pollinators
Successful pollination leads to seed formation, and pumpkins (like many plants) later rely on natural seed dispersal methods, even if humans usually harvest pumpkins.
- Plant pollinator-friendly flowers nearby, like sunflowers, zinnias, and lavender.
- Avoid pesticides, especially during flowering, as they harm beneficial insects.
- Provide fresh water for bees by placing shallow dishes with stones around your garden.
Creating a welcoming space for bees is like rolling out a welcome mat at the front door; happy bees mean happy pumpkins.
How to Hand-Pollinate Pumpkins (If Needed)?
If you notice a lot of flowers but very few tiny pumpkins forming, you should give Mother Nature a helping hand. Hand-pollination sounds complicated, but it’s surprisingly easy (and even a little fun!).
Here’s how to hand-pollinate pumpkin flowers:
- Find a freshly opened male flower (they’ll be full of pollen on the centre stamen).
- Gently remove the male flower or use a small, clean paintbrush.
- Move the pollen from the male flower to the centre of the female flower (where the stigma is located).
- Repeat daily during the flowering period for the best chance of fruit development.
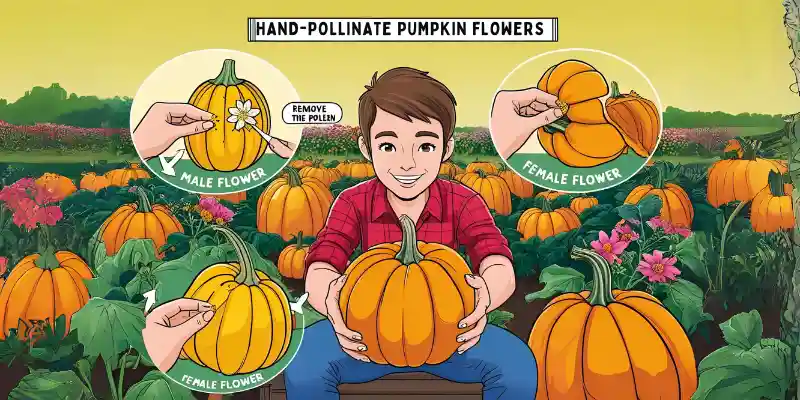
I often use a soft artist’s brush for hand-pollination in my urban garden; it feels almost like painting a masterpiece where every careful brushstroke helps grow a future pumpkin!
Step 6: Dealing with Pests and Diseases
Like any garden, pumpkins are prone to various pests and diseases. It’s as if your pumpkins are enjoying a peaceful picnic, only to have uninvited guests, pests, show up to spoil the fun. But don’t worry; with some preparation and care, you can handle these garden troubles naturally and effectively.
Common Pumpkin Pests and How to Deal with Them Organically?
Pumpkin plants are a favourite for many pests, including aphids and squash bugs, who love to feast on the tender vines and leaves. Think of aphids as the tiny ninjas of the garden, silently sucking out nutrients, while squash bugs are the clumsy bullies that leave telltale damage behind.
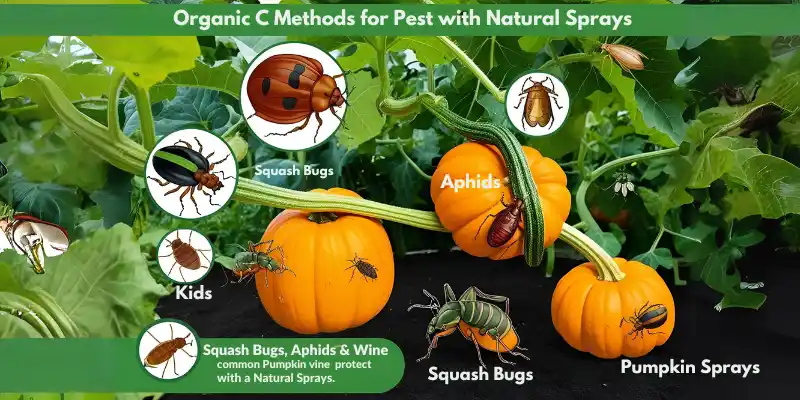
How to manage pests organically:
- Aphids: These tiny pests love the undersides of leaves. If you spot them early, you can blast them off with a strong stream of water. You can also introduce beneficial insects, such as ladybugs, which love to feast on aphids.
- Squash Bugs: These bugs are more challenging to control because they can be particularly damaging to your plants. Hand-picking them off your plants or using a homemade garlic-and-water spray (which many gardeners swear by) can help keep them in check.
Personal Insight: The first time I encountered squash bugs, I was saddened. But patience, daily checks, and diligent bug removal turned things around. The key is to stay on top of pest control early in the season.
Tips for Dealing with Powdery Mildew and Other Common Diseases
- Powdery mildew is a fungal disorder that can quickly turn a healthy pumpkin patch into a sad, spotted mess. It usually appears as a white, powdery cover on the leaves and stems, and if left unattended, it can damage the entire plant. Think of it like an uninvited guest who refuses to leave!
How to handle powdery mildew:
- Neem oil: This natural pesticide works wonders on pests and fungal diseases like powdery mildew. Simply spray it on affected areas; it’ll help kill the spores and prevent further spread.
- Insecticidal soap controls pests like aphids and squash bugs while being gentle on your pumpkin plants.
- Proper spacing and airflow: Good garden hygiene can prevent the spread of mildew. Ensure your plants have enough room to breathe and avoid overcrowding.
I was frustrated when I first dealt with powdery mildew because it spread so quickly. However, acting fast with neem oil and ensuring good air circulation around my plants kept the disease from taking over.
| Trivia & Fun Facts about Pumpkin Growth |
|---|
|
Step 7: Harvesting Your Pumpkins
After all your hard work tending to your pumpkin plants, the time will come when you can finally enjoy the fruits of your effort. Harvesting pumpkins is a rewarding experience, like unwrapping a present after waiting all season.
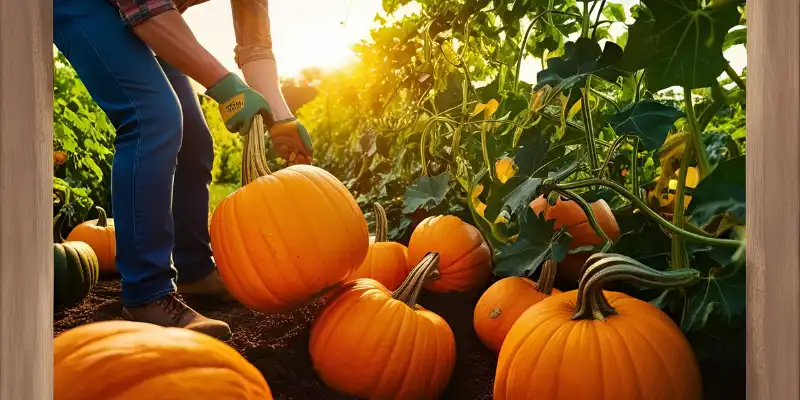
However, to ensure you’re picking at the perfect moment, there are a few key signs to look for.
Signs Your Pumpkins Are Ripe
A ripe pumpkin will have a vibrant color, firm skin, and a dry, brown vine. Think of it as a piece of fruit ripened perfectly on the tree; you just know when it’s time!
- Colour: Pumpkins should have a rich, solid color (orange for most varieties, but some may be green or white). If they still look pale or greenish, they’re not ready yet.
- Firmness: Gently press on the pumpkin’s skin. If it’s hard and doesn’t give, it’s ripe! If it’s soft or squishy, give it more time.
- Vine Dryness: When it’s time to harvest, the vine connecting your pumpkin to the plant should be dry and brown. It’s like the pumpkin’s final “goodbye” to the plant!
Personal Insight: In my early gardening days, I made the mistake of harvesting too soon and ended up with pumpkins that didn’t store well. Now, I wait for those key signs and feel a sense of pride when I know it’s time to pick them!
Harvesting Pumpkins Step-by-Step
Cutting your pumpkins off the vine may seem straightforward, but it’s essential to do it carefully to avoid damaging the pumpkin or the vine. Think of it like slicing a cake with precision.
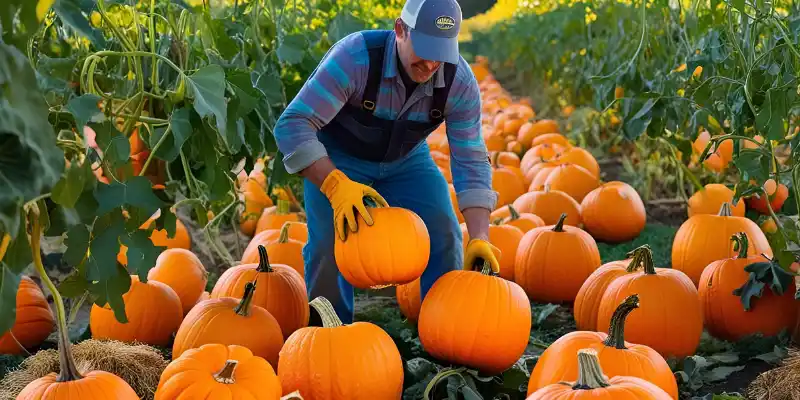
- Use a sharp knife or pruning shears. A clean cut is key to preventing infections from entering the pumpkin.
- Leave a few inches of stem: When cutting, leave about 3–4 inches of stem attached to the pumpkin. This helps prolong shelf life and prevents rot.
- Cut the vine cleanly: Avoid pulling or twisting the pumpkin off the vine. Instead, make a clean cut to avoid damaging the pumpkin or the stem.
Step 8-Long-Term Pumpkin Storage
Once harvested, you’ll want to store your pumpkins properly so they last for months. It’s like giving them a cozy home to rest in before they’re ready. You can use them in pies or soups.
- Dry the pumpkins: After harvesting, leave the pumpkins in a dry, warm area for a few days to cure. This toughens the skin and helps it last longer.
- Store in a cool, dry place: Once cured, store your pumpkins in a cool, dry spot. A basement or a cool pantry works great! Avoid areas with high humidity or direct sunlight.
- Check regularly: Look for soft spots or signs of rot. If you spot one, use the pumpkin quickly to avoid spreading the rot.
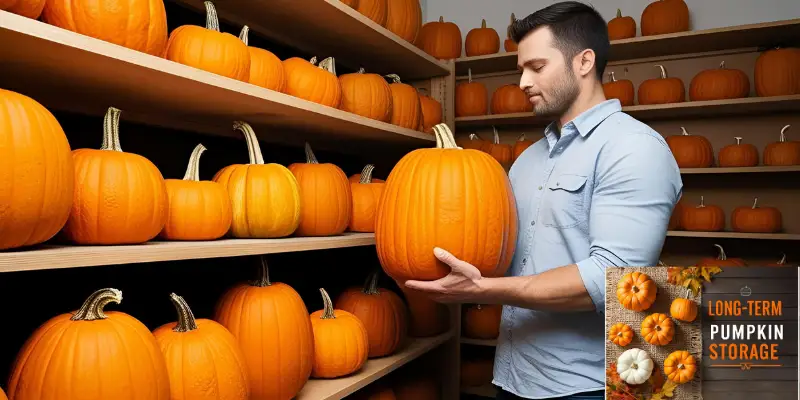
Personal Insight: I remember my first time storing pumpkins; I didn’t know about curing, and some of my pumpkins didn’t last as long. Now, I cure them adequately and enjoy home-grown pumpkins well into the winter!
5 Precautionary Measures for Growing Pumpkin Seeds
Even with their hardy vines and prominent personalities, pumpkins need thoughtful care to thrive from seed to harvest. By following these precautionary measures early on, you’ll protect your plants from common beginner mistakes and boost your chances of a bumper crop.
|
Final Verdict
Growing pumpkins from seeds is more than just planting and harvesting; it’s a journey filled with learning, patience, and joy. As we’ve explored the step-by-step process of how to grow pumpkin seeds, from choosing the right variety to harvesting and storage, every step brings you closer to a thriving, beautiful garden.
From my experience, giving pumpkins plenty of space, consistent deep watering, and a little organic love (like neem oil for pests) makes all the difference. Don’t be afraid to start small; even a tiny urban garden can produce a giant golden prize!
Ready to plant your first pumpkin patch? Start today with our simple steps and turn your garden dreams into a glowing reality.
Frequently Asked Questions
After learning the basics of how to grow pumpkin seeds, you might still have a few questions in mind, and that’s completely normal! Here are some of the most common beginner questions answered clearly to help you grow with confidence.
The best time to plant pumpkin seeds is in late spring when the soil has warmed to at least 70°F (21°C). Pumpkins love warm weather and need a long growing season to mature. Always check your local frost dates before planting!
Plant pumpkin seeds about 1 inch deep into the soil. If you’re sowing directly into the ground, place 2–3 seeds per spot and thin them later. Make sure the soil is loose and well-draining.
If you choose compact or mini varieties, you can grow pumpkins in large containers. For enough root space, use a container that is at least 15–20 gallons. Water regularly and provide support for sprawling vines.
Pumpkins thrive in full sun and require at least 6–8 hours of direct sunlight daily. More sunlight means healthier vines, better flowering, and bigger fruits. Choose the sunniest point in your garden for the best results!
Pumpkin seeds available for home gardening are usually heirloom or hybrid. Most seed companies do not sell GMO pumpkin seeds to the public, so you’re likely planting non-GMO varieties. To save seeds and grow naturally year after year, look for heirloom pumpkin seeds on the packet label.
Water your pumpkins deeply about once or twice a week, depending on the weather. During flowering and fruiting, they may need more frequent watering. Always aim for deep soaking rather than light, shallow watering.
Use organic methods like neem oil, insecticidal soap, or companion planting with herbs like basil. Handpick pests like squash bugs when you see them. Keeping your garden clean and rotating crops also helps keep pests away.
| Reeference |
|---|


- Be Respectful
- Stay Relevant
- Stay Positive
- True Feedback
- Encourage Discussion
- Avoid Spamming
- No Fake News
- Don't Copy-Paste
- No Personal Attacks
- Be Respectful
- Stay Relevant
- Stay Positive
- True Feedback
- Encourage Discussion
- Avoid Spamming
- No Fake News
- Don't Copy-Paste
- No Personal Attacks
